Record locking is used for preventing simultaneous update of the same data and therefore avoiding inconsistent results. A locked record means it is not available for editing by other users. In this article we describe how to implement record locking in web applications.
Because of the stateless nature of HTTP, you cannot really know whether the user left the page or is still looking at your site. We used the lock confirmation technique combined with lock expiration to solve this problem.
Let’s start!
Firstly, you need to create a table in your database (hereafter the lock table) with the following fields:
- ID – the auto increment field.
- RecordID – the identifier of the locked record. In the example described below table name and values of the key fields are used to determine a record to be locked.
- SessionID – the name of the user or session ID that locks a record. In our example the session ID is used. Therefore if two users with the same login open one record for update, the lock mechanism will work as for different users.
- Timestamp – the last access timestamp.
As it is possible that the user would not release the lock, it is necessary to determine the Expiration Period – an amount of time after which a lock would be released automatically.
How does the record locking work?
1. When user opens a record for editing, locking the record will result in new entry added to the lock table with the following values:
- ID – an auto increment.
- RecordID – the record to be locked.
- SessionID – session_id ().
- Timestamp – the current date / time.
Then look whether the record was not locked by someone earlier. To do that, select all not expired entries related to this record from the lock table. Look for records of other users with ID smaller than ID of your record. If no records found, the lock succeeded and a record can be edited. Otherwise, the lock failed. You should remove your record from the lock table and notify the user that the record is modified by another user.
2. While editing a record, every N seconds run AJAX request to confirm the lock. Note that N must be less than Expiration Period. The lock timestamp is updated to ensure that the lock is not released. Lock confirmation works just as the lock.
In our example the ConfirmLock function is used. It sends AJAX request to confirm the record lock.
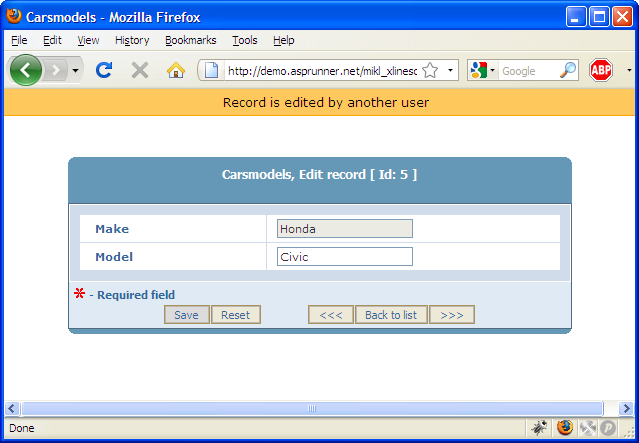
setInterval("ConfirmLock(...)",10000);If response is empty – the lock is valid. In other case it returns the message that should be shown to the user i.e. “Record is edited by another user”.
3. Before updating or deleting the record, make sure the lock is still valid.
4. When user leaves the “edit” mode (‘Back to list’ button), send AJAX request to release the lock. It means to remove all records with your RecordID and SessionID from the lock table. If you do not release the lock (user hits browser’s ‘Back’ button), it will be done automatically after Expiration Period.
This is the basis of the record locking mechanism. There are several other points you need to consider.
User notification
The user must know when locking is not possible or lost. At each stage (1 through 3) this is done differently. During the initial locking you can simply show the message that the record is locked. But at stage 2 and 3 it is more complicated. How do we deal with the data that user already entered? In our example the data remains, but cannot be saved (edit controls are disabled).
Special situations
For example, the user edits the record and loses the connection, which will trigger the lock. At this time, another user edits and saves the same record. Then, as soon as the first user regains the connectivity, the record he was previously working with will be locked. In that case he should reload the page with new data, before proceeding with the changes.
It is also possible to allow the first user to proceed with record editing after he regains the connection. However, in that case the changes made by the second user will be lost.
Infinite lock
For example, the user opened the page, locked it and went on vacation. While the browser is open, the page remains locked. There are two ways to solve this problem. You can set the maximal duration of the lock. In this case you need to save the time of the lock in the lock table.
The second way is to create the admin user who can re-assign the lock to himself or release the lock. The admin user should be able to see who and when locked the record. This additional information (username, lock start time and, perhaps, IP address) can be also stored in the lock table.
In our example if admin enters the page while record is locked by another user he will see the Unblock record and Edit record options.

Implementation of record locking
HERE you can download sample project created by PHPRunner – software that builds great looking PHP+MySQL web sites. SQL script that creates tables in MySQL can be found in db folder.

